

ABLETON LIVE
If you would like to install and use your new BLVCKWAVE SOUND libraries within the stock plugins environment of ABLETON LIVE I suggest using the DRUMRACK plugin.
BUT FIRST, LET'S STOP ABLETON'S ROGUE .ASD FILES FROM RANDOMLY MANIFESTING IN YOUR NEW BLVCKWAVE DRUM FOLDERS!!!
STEP 1:
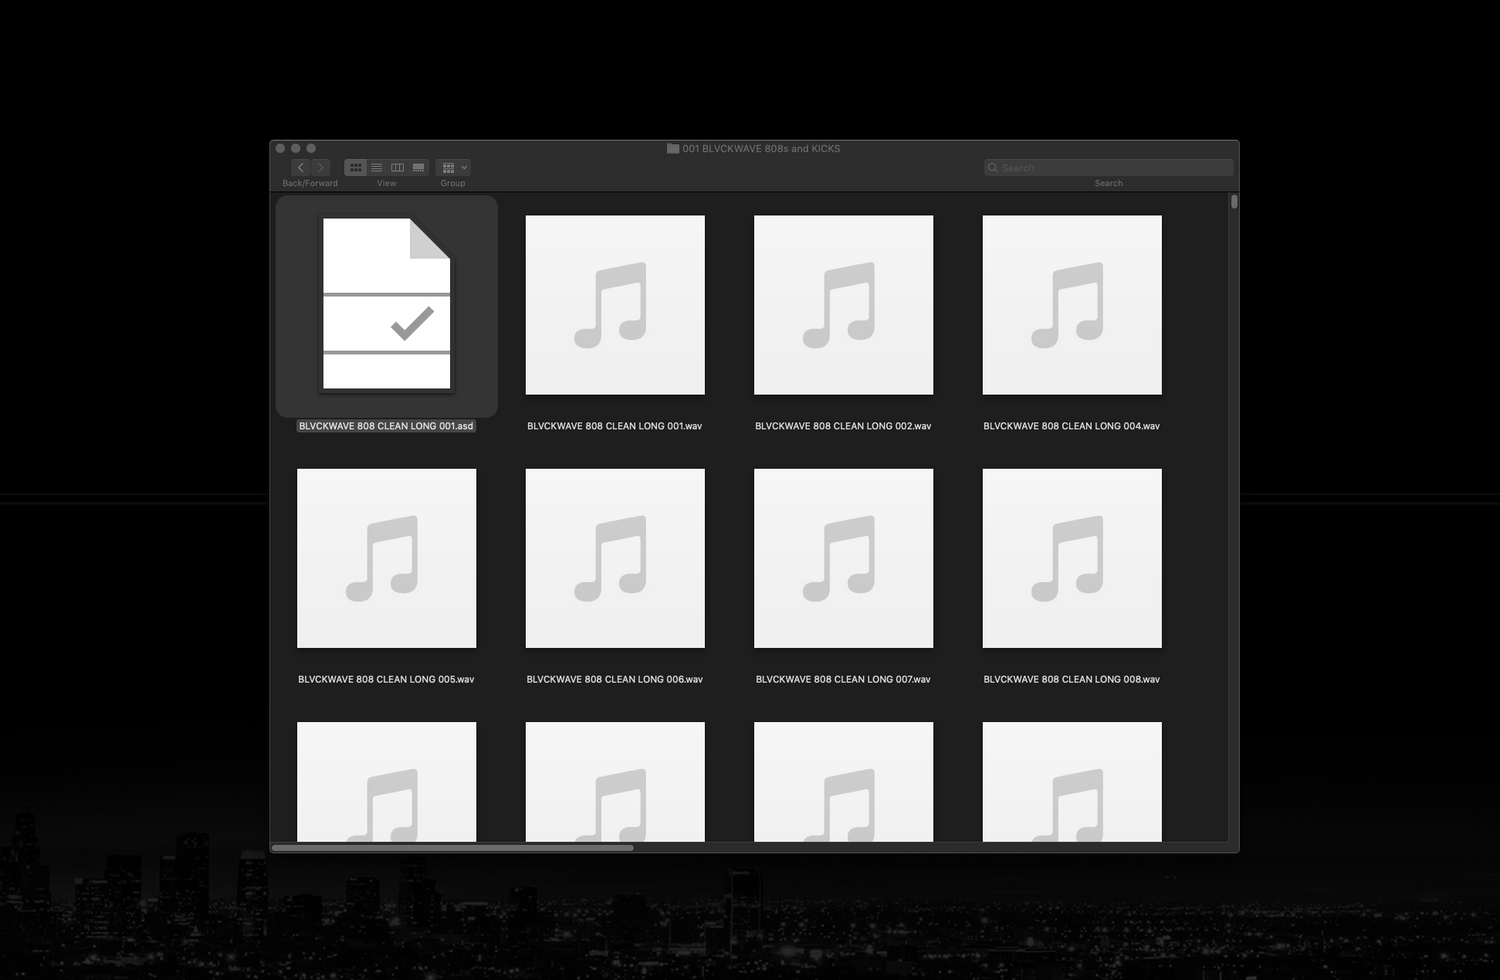
Before we do ANYTHING in ABLETON, let’s clear one thing up. ABLETON’s insane desire to create random .asd files all over your perfectly organized BLVCKWAVE SOUND folders.
You see, for some reason that makes no sense to me, ABLETON LIVE seems to create these .asd files and puts them inside all of your Audio Sample folders library folders.
THIS IS NOT WHAT ANY SANE, ORGANIZED PROFESSIONAL WANTS. Luckily, for all of us, there is an easy fix.
STEP 2:
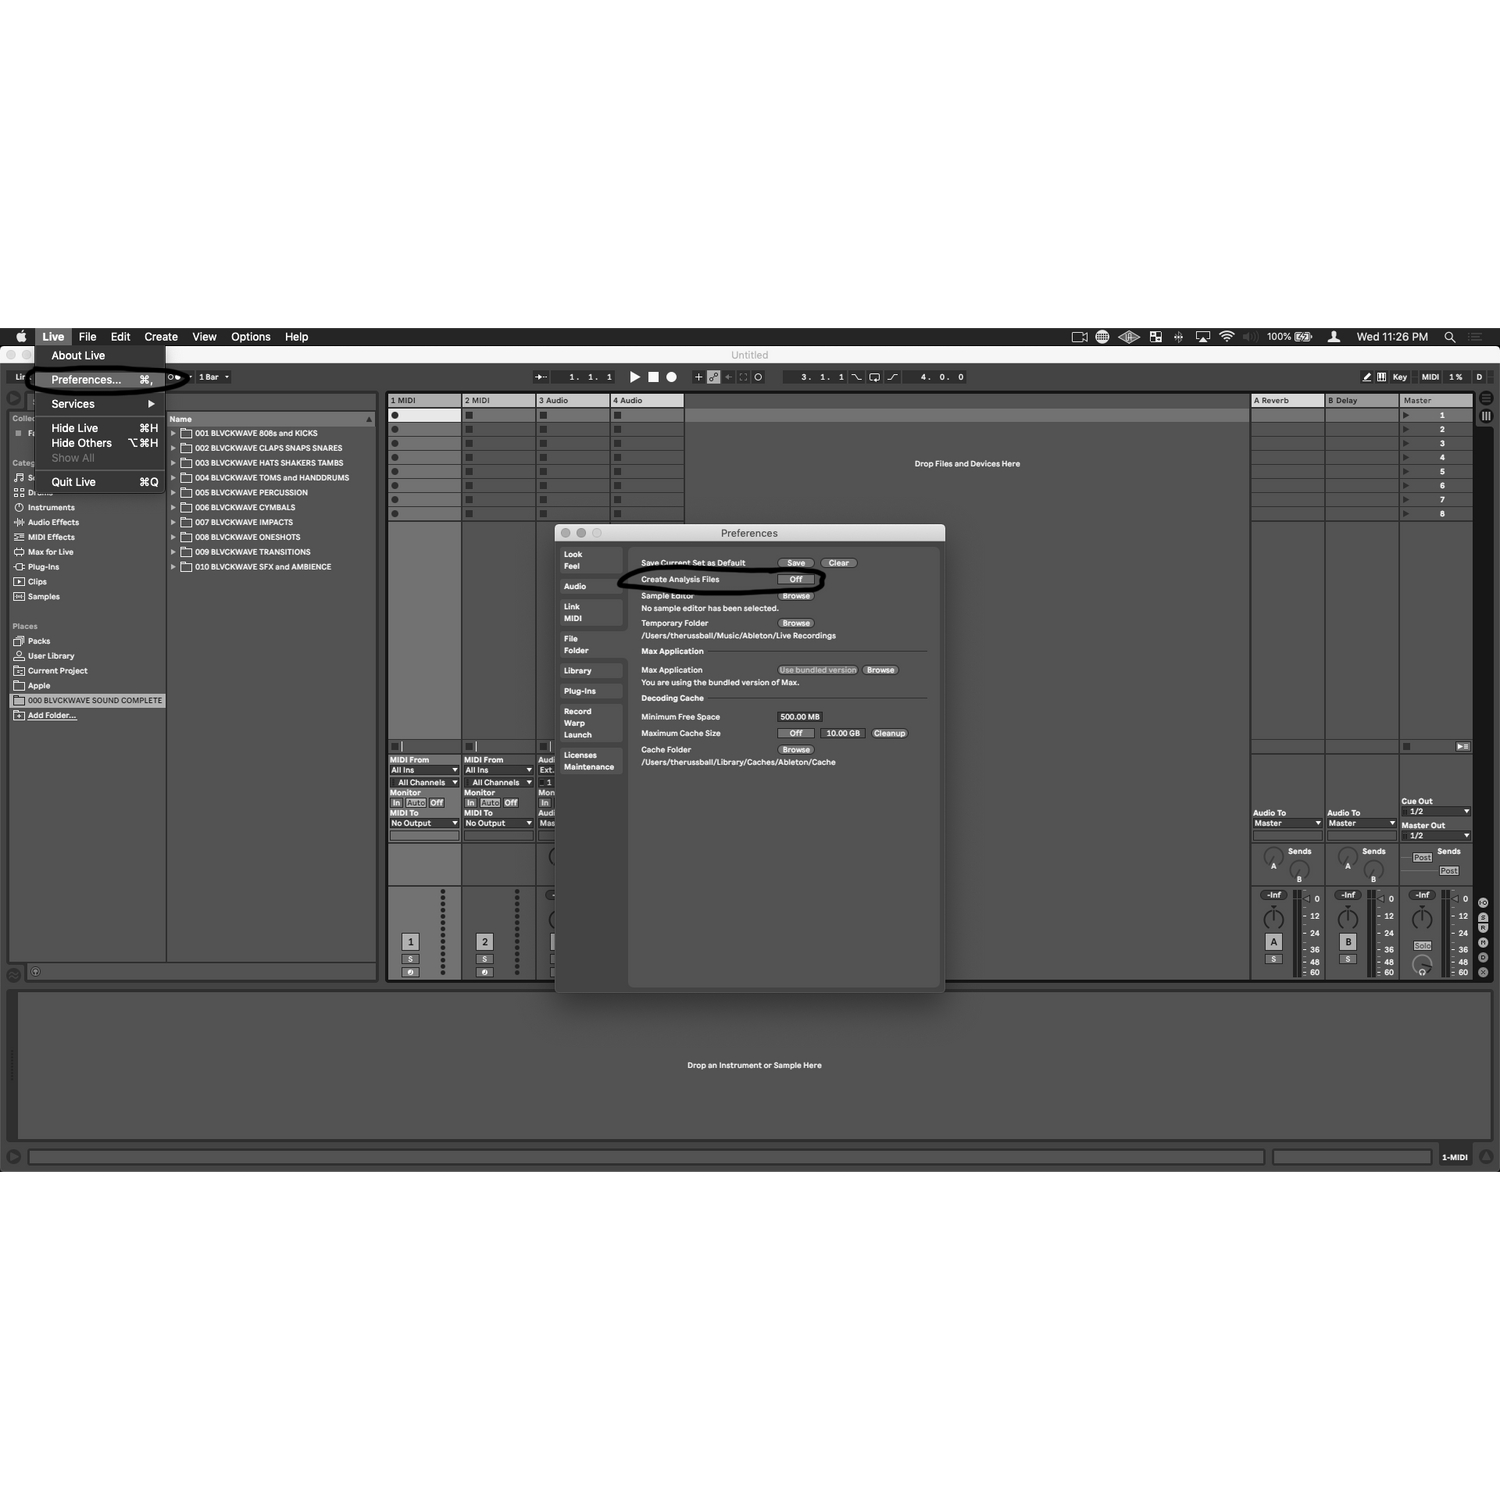
First, click “Live” at the top left of the finder window and go to “Preferences”. From there, click on the submenu to the left of the “Preferences” window that says “File Folder”. From there, the second option down “Create Analysis Files” is likely turned on by default. TURN THIS OFF to stop ABLETON dead in its rogue random .asd file creating tracks, and put an end to un-organization.
From what I understand, these .asd files contain data on any edits you may make to the imported samples, such as time stretching, pitch shifting, or whatever other adjustments you may have made to the individual sample.
They seem to be completely unnecessary and your sessions will still work fine and remember all of your settings anyway. Apparently these .asd files assist in “helping remember an imported samples' settings” subsequently decreasing the load time of the session.
I have tested it both ways just to make sure I wasn’t losing out on some valueable data. It appears to be a totally pointless feature that only serves to RUIN YOUR PERFECTLY ORGANIZED SAMPLE FOLDERS. Just turn it off and never look back.
STEP 3:
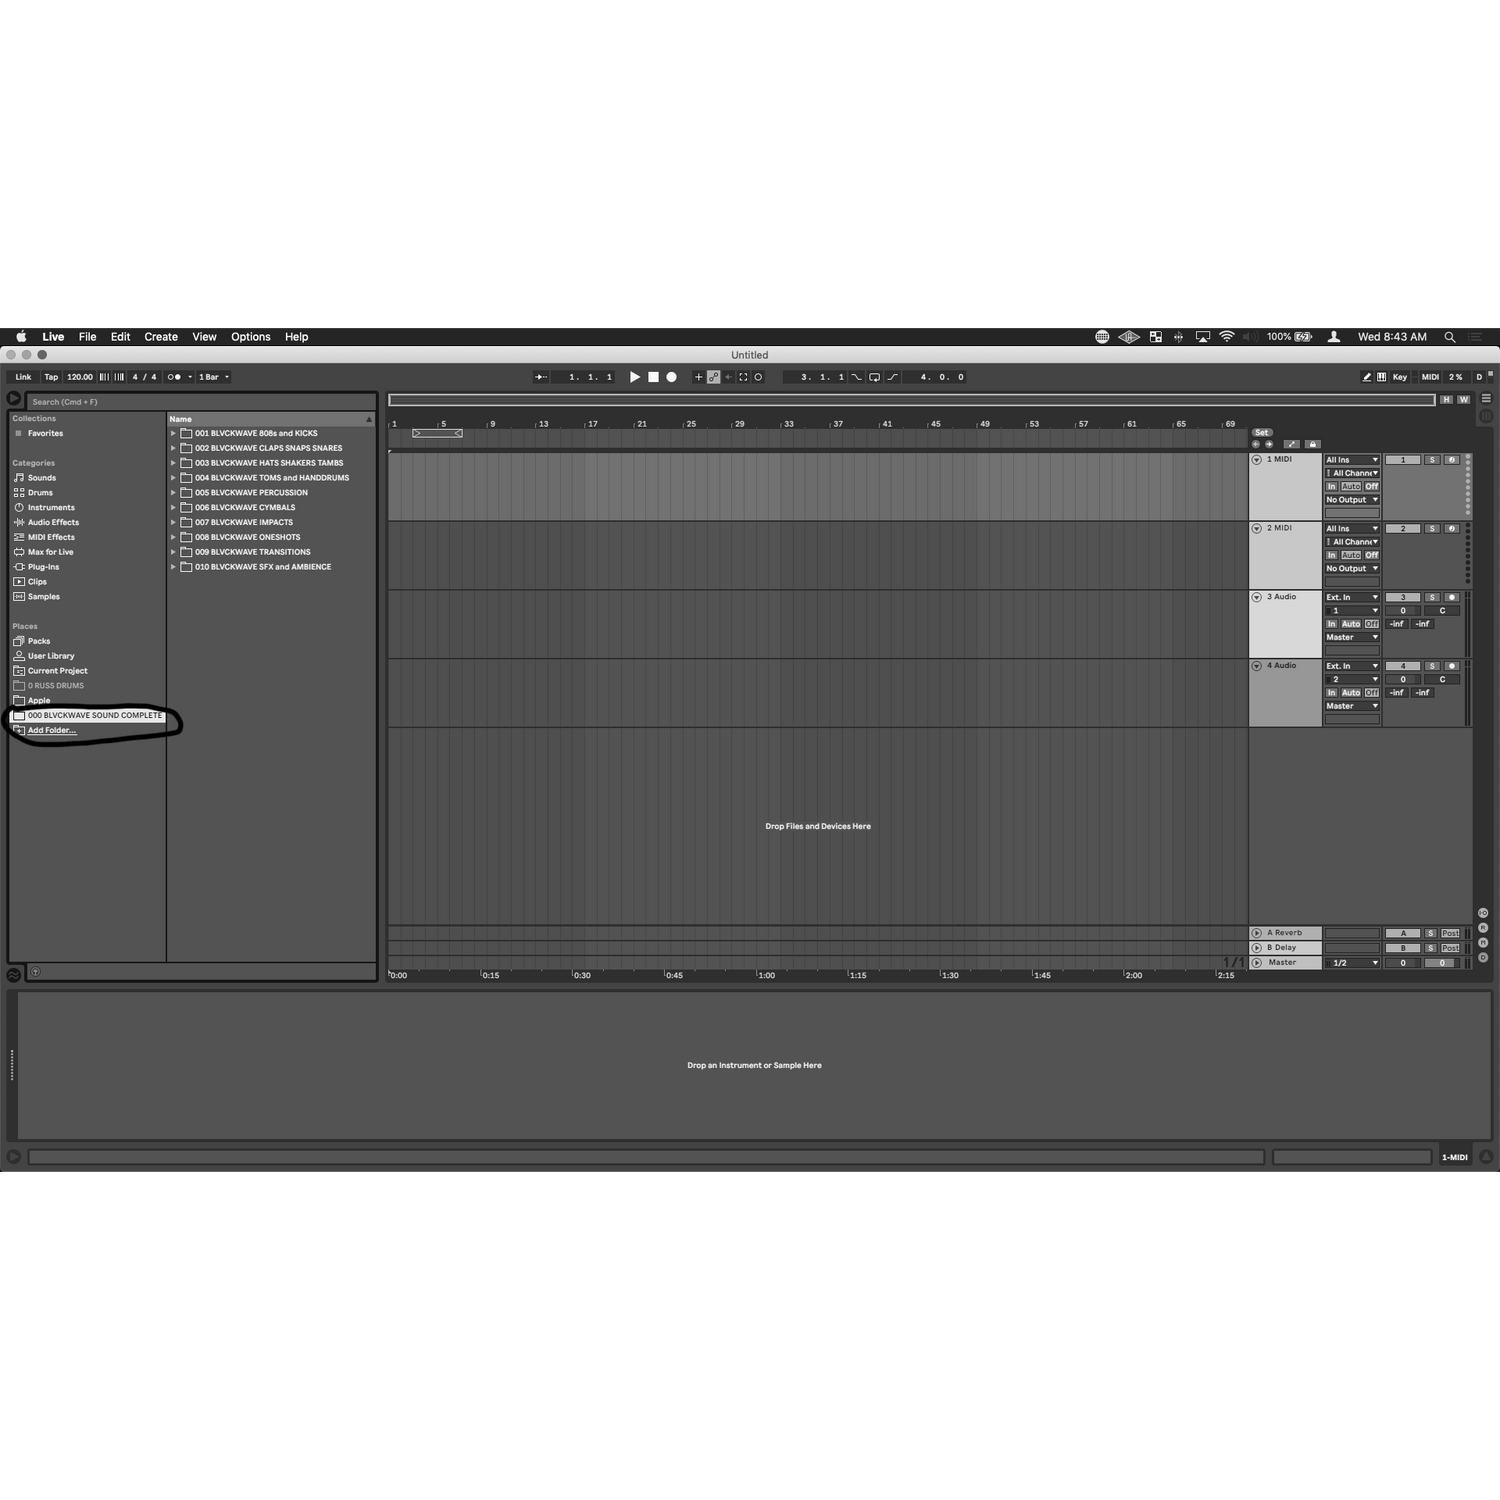
Great! Now that ABLETON is functioning like a normal DAW now, let’s look to the LEFT side of the screen and go to the very BOTTOM and click + ADD FOLDER.
From here, all you have to do is go to wherever you stored your BLVCKWAVE SOUND library folders and add the location.
Once the BLVCKWAVE SOUND folders have been added they will appear on the left side along with ABLETON’s other samples and plugins.

STEP 4:
In my opinion the best & quickest workflow for using BLVCKWAVE SOUND libraries within ABLETON LIVE is to add a DRUM RACK Plugin to the bottom of your track window.
The DRUM RACK plugin can be found in two locations within ABLETON LIVE on the left side menu. Under INSTRUMENTS; and also under DRUMS; where there is a selection of pre-made stock Ableton kits. (Not BLVCKWAVE)

STEP 5:
Once loaded into the bottom track window you can navigate back to the BLVCKWAVE SOUND library folders and browse, test, and select samples within ABLETON LIVE’s audition window.
When you find a sample you want to add to your kit, simply drag it onto the pad you want to trigger the sample with. DRUM RACK displays 16 pads at a time but if you scroll vertically you will notice DRUM RACK contains more pads that can be assigned to all 88 keys of your midi controller.
YOU ARE DONE! HAVE FUN.